moen 7840 moen 7840 moen 7840[/caption]
It's the little things that add up to a lot of transitional style for Camerist. A flared-tip spout, simple curves and single-handle operation create an updated basic collection.
moen 7840 moen 7840 moen 7840[/caption]It's the little things that add up to a lot of transitional style for Camerist. A flared-tip spout, simple curves and single-handle operation create an updated basic collection.
 moen 7560 moen 7560 moen 7560[/caption]
Extensa's delicate present day styling and streamlined shape mixes flawlessly with any kitchen stylistic layout and elements the comfort of a pullout gush. Richly basic, the Extensa accumulation's elegant bends and forms stream as delightfully as the fixture's water stream, making a transitional style that traverses an assortment of brightening patterns.
 moen 21005 moen 21005 moen 21005[/caption]
moen 21005 details and price
MOEN
Invigorate 7-Spray Hand Shower and 9 in. Shower Head Combo Kit in Chrome
2.5 GPM stream rate
Huge 9 in. breadth showerhead for full scope
$165.91/each
item Overview
Pick your washing knowledge with the MOEN Refresh 7-Function Handshower and Showerhead Combo Kit. It offers style and capacity. With it, you have the adaptability of picking between seven distinctive splashes, as well as between utilizing the showerhead and handheld independently or all the while.
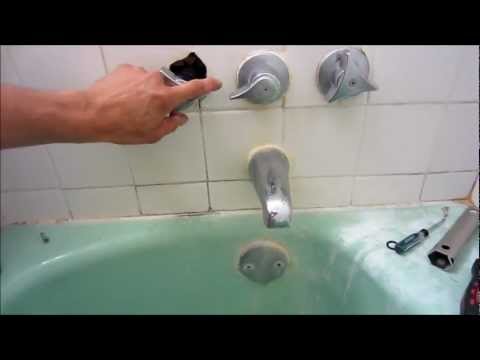
 turn tub faucet into shower turn tub faucet into shower turn tub faucet into shower[/caption]
turn tub faucet into shower DIY
The most effective method to Change over a Tub to a Shower
Quick paced, present day living practically requests having a shower unit, however when space is at an excellent, how might you crush one in? Attempt these thoughts for changing over the tub to a shower.
There's in no way like unwinding in an energetic, welcoming shower to give your considerations a chance to blur away. Be that as it may, having sufficient energy to wash up can be an extravagance all by itself. That is the reason having a shower just bodes well - and why new development frequently incorporates a shower in each full shower.
In the event that you live in a more seasoned house that hasn't yet been overhauled or need to change over a standard shower, you're likely confronting a 5x8-foot space with a latrine, a little vanity, and a tub, which doesn't leave space to add a shower to the current arrangement without smothering a few dividers or reconfiguring the current tub.
To change over your tub, consider these two choices to settle on the best choice.
1. Remove the tub and fabricate another shower. This is not a little occupation, so know your DIY capacities or call an expert temporary worker to help you survey the space and potential arrangements. In the impression where the tub stands, you will have a lot of space to construct a shower, yet you'll need a tile or strong surface control to shield the water from spilling out into the restroom.
Another thought for a little space shower is the entryway. In case will have a shower entryway, ensure there is space for the way to swing open without hitting the latrine or sink. Shower entryways aren't required. Actually, there are great looking halfway glass boards that keep the water contained. These can let in cool air, be that as it may, so ensure the room is warm and consider adding a warmed floor to your shower. (Reward: The warmth will likewise keep the floor dry and lessen the likelihood of slips.)
One con to detaching a tub and supplanting it with a remain solitary shower is resale. Numerous mortgage holders need a tub for showering youngsters, especially if the lavatory being redesigned is a mutual family space.
2. Retrofit the pipes. The less intrusive arrangement is retrofitting the current lavatory pipes to make a shower/tub unit. This permits you to keep the current tub while including the required pipes for a shower. You'll have to open up the divider (ordinarily from the room adjoining the shower) and be required to convey the pipes up to code. You'll additionally need to pick a tile for the dividers. Numerous little showers have a window over the tub, which is something else to cure.
Two basic arrangements incorporate walling it off and tiling over it or supplanting it with glass square, which will confront water. Discuss other conceivable window arrangements with your developer. Your shower will require a nook, as well. You can add sliding entryways that mount to the highest point of the tub, however a not so much costly but rather more ornamental arrangement is to hang a give blind a plastic liner. For shower window ornament equipment, you can purchase a pressure mount bar or a divider mount bar. Divider mount adaptations are straight or bended. The last makes the shower feel more extensive.
Despite which arrangement you pick, changing over a tub to a shower presents chances to update lighting, venting, and to work in pleasantries that enhance the experience, for example, a seat, racks, or a specialty for cleanser and cleanser.
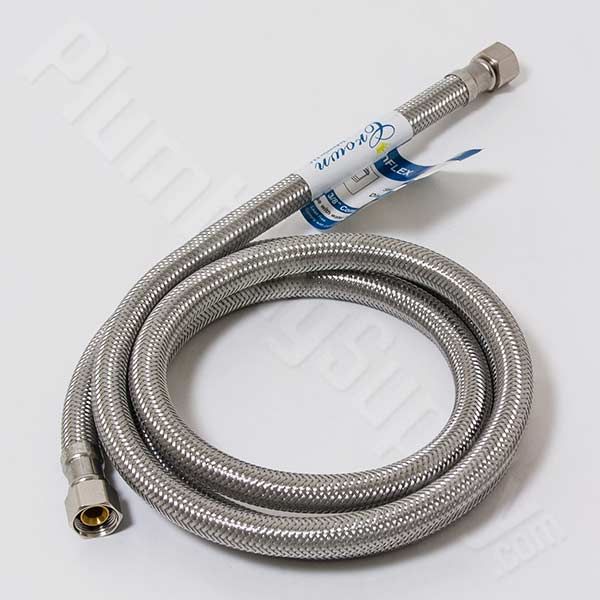
 faucet supply line adapter faucet supply line adapter faucet supply line adapter[/caption]
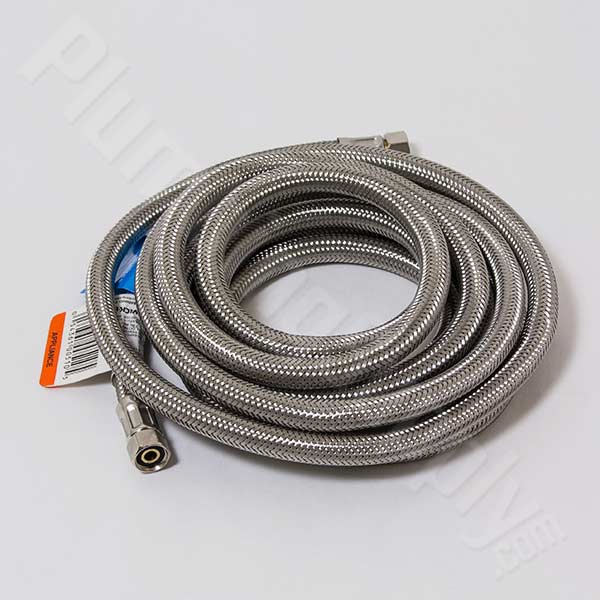
faucet supply line adapter
These quality braided stainless water flex lines are the perfect choice for hooking up a faucet to your water supply. With multiple fittings to choose from, you are sure to find the right flex for your needs.
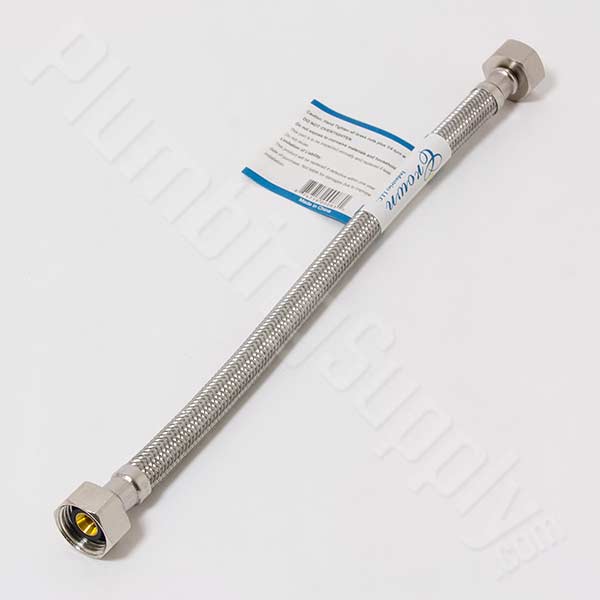
These superb braided stainless water flex lines are great additions for installing appliances such as dishwashers or other items that require a dedicated supply feed. Durable, well made flexes are sure to last even under some of the toughest circumstances.

 faucet com faucet com faucet com[/caption]
faucet.com
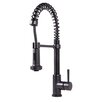
Wave On, Wave Off
Faucets equipped with MotionSense Wave technology are perfect for when your hands are too full or too messy to turn on the faucet. This functionality also helps to minimize the spread of dirt and germs, since there’s no need to touch the faucet to start the flow of water.
 black kitchen faucets pull out spray black kitchen faucets pull out spray black kitchen faucets pull out spray[/caption]
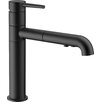
black kitchen faucets pull out spray modern
 vanity with sink vanity with sink vanity with sink[/caption]
vanity with sink modern
Interested in updating your bathroom vanity to a double vanity, corner vanity, wall mount vanity or mirrored vanity? Choose from a variety of vanities with tops, small bathroom vanities, granite vanity tops, vanities without tops, unfinished bathroom vanities or just vanity tops. All of Lowe’s selections come in a great range of colors, finishes, sizes and price ranges. Whether it’s got to be a KOHLER vanity or you need to fit a tight space, you’ll find what you need here. To enhance your space, we also offer vanity accessories like drawer organizers, bathroom cabinets, vanity mirrors and vanity molding. Modern bathroom vanities offer a great mix of style and function, from sleek, space-saving corner vanities to craftsman-inspired rustic bathroom vanities. Add the finishing touches to your vanity space with your choice of one of our many bathroom sinks, bathroom mirrors and bathroom vanity lights. Once you’re done, you can add bathroom shelves for more storage and tie the whole look together with additional bathroom lighting. Like do-it-yourself projects? Add or replace your vanity on your own time with the help of our Install a Vanity and Sink Guide.
 vanity table walmart vanity table walmart vanity table walmart[/caption]
vanity table walmart cheap
FEATURES:
 vanity chair cheap vanity chair cheap vanity chair cheap[/caption]
vanity chair cheap price
Are you looking for a unique but practical dressing table then try this Songmics marvelous product. Made of high-quality wood, this big dressing table is rather stable and durable. You will be attracted by its delicate craft and lovely appearance. The amazing storage capacity enables this dressing table quite practical. This stylish modern vanity table set comes with 3 mirrors, 1 stool, and 5 storage drawers. The table with its drawers are great for storing all your jewelry, hair accessories, nail polish, hair care product.
The Iris vanity table and stool is a versatile set for a variety of spaces. The functional drawer provides storage while the tilting mirror offers ease of use. The padded, upholstered seat provides comfort. White finish with beige seat.
 lowes 36 inch vanity lowes 36 inch vanity lowes 36 inch vanity[/caption]
lowes 36 inch vanity white modern
 bathroom vanitys bathroom vanitys bathroom vanitys[/caption]
bathroom vanitys chic
Complete your bathroom with this stylish and functional bath vanity. With a simple grey finish, sleek lines, brushed nickel square knobs, and a white quartz marble top, the vanity complements any decor with contemporary elegance. The two doors open to a spacious interior, and four drawers provide plenty of storage space for toiletries and supplies.
Features:
Dimensions:
The London 54-inch Solid oak wood cabinet in white finish has a white marble countertop with a matching framed mirror in white.
A perfect complement to a contemporary space, the Vinnova Gela vanity combines the clean, sharp lines of modern design with classic furniture styling. The carrara white marble countertop provides a dramatic contrast with the dark grey cabinet. Simple, bar-style pulls and knobs adorn the spacious drawers and doors, which conceal ample storage space for all your bathroom accoutrements.
Features:
Add touches of elegance and sophistication to your bathroom with this London 78-inch double-sink white vanity set. The finish blends in perfectly with a variety of bathroom decor themes and is easy to accessorize. Made with solid wood and featuring the Carrara white marble top, this vanity spells quality and style.
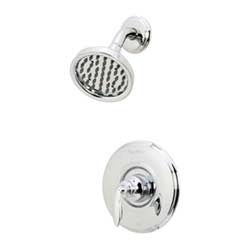
 leaky shower head leaky shower head leaky shower head[/caption]
leaky shower head
 shower heads lowes shower heads lowes shower heads lowes[/caption]
shower heads lowes modern
 Remove the showerhead by unscrewing it from the pipe with your hands. If the head is stuck on tight (as they often are if they haven't been removed in a while), use pliers or a crescent wrench to unscrew it. Look at the threads inside the showerhead for a small plastic washer or rubber O-ring. It's often the wear and tear of age on this component that can cause a showerhead to leak and start dripping. Over time, it dries out and becomes brittle which decreases its ability to hold in water. If it looks worn or damaged, replace it.
 How you disassemble it depends on what kind of faucet you have: one-knob or two-knob style. If you have a two-knob system then you will need to replace both valves. Use a screwdriver and crescent wrench to unscrew the valves and remove the knobs or handles. Remove the guard and set it aside. You should see two nuts. Unscrew the larger of the two; only one of them needs to be unscrewed to reach the shower stem. Remove the shower stem by unscrewing it in a counterclockwise direction.
 If you have to shut off the water to the entire house, plan and organize ahead of time. Read through all of the instructions and have the tools and materials that you’ll need readily on hand to minimize the time your home’s water will be off—and alert your family. After shutting off the house water, faucets and water-using appliances won’t work but each toilet will have one flush.